Project Tusk Phase 4 Complete: Oxygen Mask Audio
Scroll DownThis is a blog post in the Project Tusk series. To read about the project, see Project Tusk.
Basic Description
In the previous Phase of Project Tusk, we started the audio subsystem rebuild by installing real audio hardware right into the helmet. We got 20 kHz audio out of stereo headphones embedded in the original earphone cups.
However, we had two problems - we had poor microphone quality since there was only a small hanging microphone left from the headset, and there was no way to transmit audio from inside the oxygen mask when it was attached.
Phase 4 set out to solve these problems and give us full fidelity microphone output in both masked and unmasked flight.
Check Out the Video
A full breakdown of the Tusk Phase 4 build is available on YouTube, including a brief Flight Test - this gives a good idea of the steps involved.
For all Tusk videos, see the Project Tusk playlist on YouTube.
The build took some modern components, a little bit of old component removal, and an improvised solution for attaching the mask as the old fitting hardware is no longer available.
Boom Mic Audio Details
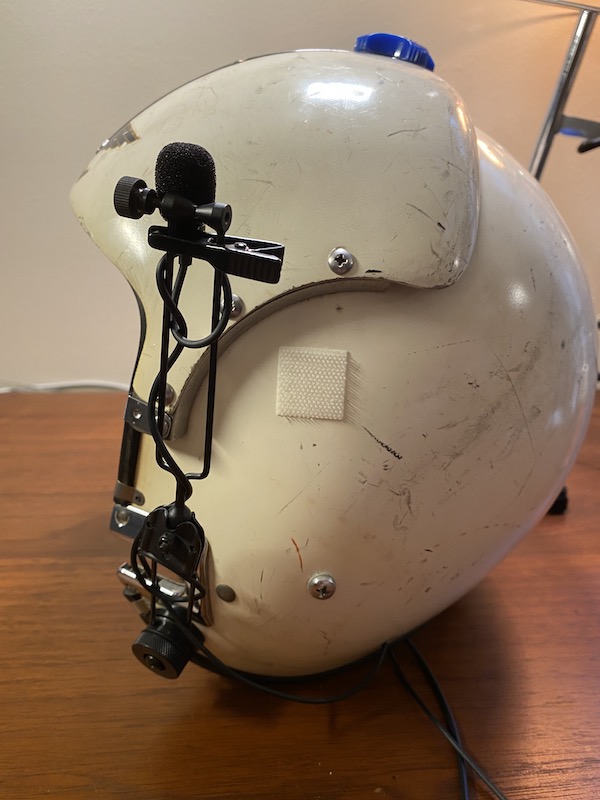
As covered in the Phase 3 blog post, we installed the Vogek Wired Headphones with Microphones into the ear cups of the helmet. This left a small integrated microphone hanging about four inches below the left earcup. It could pickup voice if it was manually held near the mouth, but it wasn’t a permanent solution.
For that, we needed a dedicated microphone, and a mounting solution that was reasonably compatible with the helmet (and ideally, somewhat historically accurate).
I found and installed the following components:
The video above shows the install of the lavalier briefly. The mount itself was a perfect fit right out of the box, fitting right underneath the left-hand oxygen mask clip receiver, screwing into a hole already put through the helmet.
Oxygen Mask Audio Details
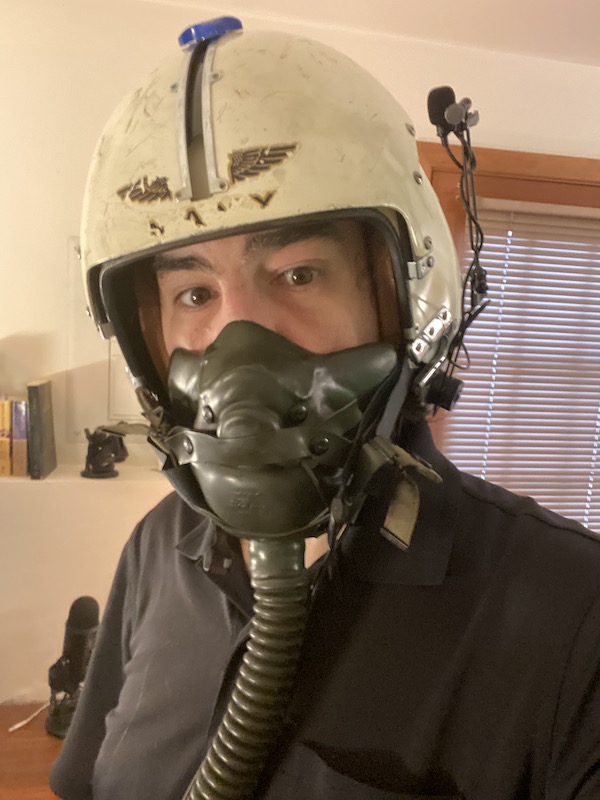
At altitudes above 10,000 feet or in combat conditions where cabin depressuirization is a risk, pilots need to breathe supplemental oxygen. The APH-6 helmet I’m using for Project Tusk came with an A-14 oxygen mask in decent shape, with some noticeable degradation and crumbling of the rubber on the underside of the mask.
If I wear the mask when flying, my voice can’t be easily picked up on the boom microphone, making radio communication or voice commands on my simulator impossible. Part of Phase 4 is rewiring the oxygen mask with modern hardware so that I can transmit while wearing the mask.
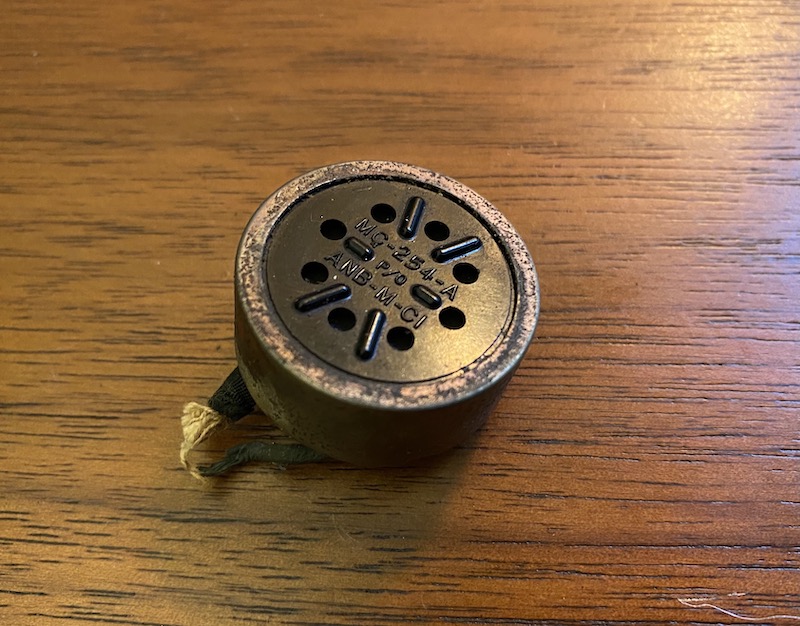
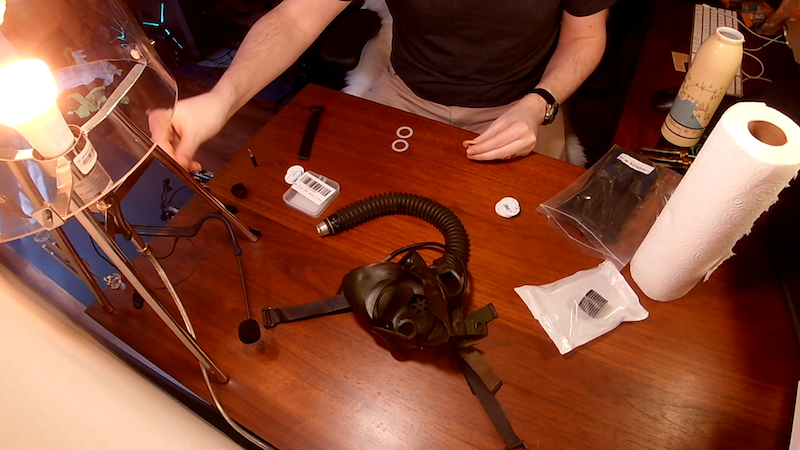
The mask already had a vintage MC-254-A microphone installed. I removed this with the help of some wire cutters, and this left a cavity where I could install a new microphone.
The mask did not have any way to fit to the helmet. This APH-6 was equipped with receivers on the helmet that took a “Butterfly Clip”-style attachment that would be fastened to each side of the mask. These clips did not come with the mask, nor are they readily available anywhere.
I found and installed the following components:
- A Lavalier Microphone with 3.5mm Jack
- Two Reusable Cinch Straps, 1 in. width
- Four LOVIMAG 1.26 in. Neodymium magnets
The lavalier microphone went easily into the cavity left by the MC-254-A and the 3.5mm jack and wire fit easily through the wire hole that was used previously by the vintage microphone wire.
Two magnets went on the cinch straps, the straps went onto the mask. Two magnets went onto the inside of the butterfly receivers inside the helmet.
With some trial and error on strap length, I was able to secure a temporary magnetic attachment of the oxygen mask to the helmet, and quickly detach by pulling out and breaking the magnetic hold.
Notes from The Build
The following issues of interest arose during the breakdown and rebuild:
Imperfect fit. Rubber degradation is to be expected in a helmet/mask combo that’s 50+ years old. However, none of my at-home methods have been able to restore the rubber or fix tears in the mask. Silicone spray, vinyl patch kits, superglue - none of these have worked. The mask is therefore an uneven fit and uncomfortable. Further, the magnet attachment method doesn’t quite have the hold strength needed to keep the entire mask assembly tight to the face for extended periods of time. The overall result is an imperfect fit - something to look at for a future fix.
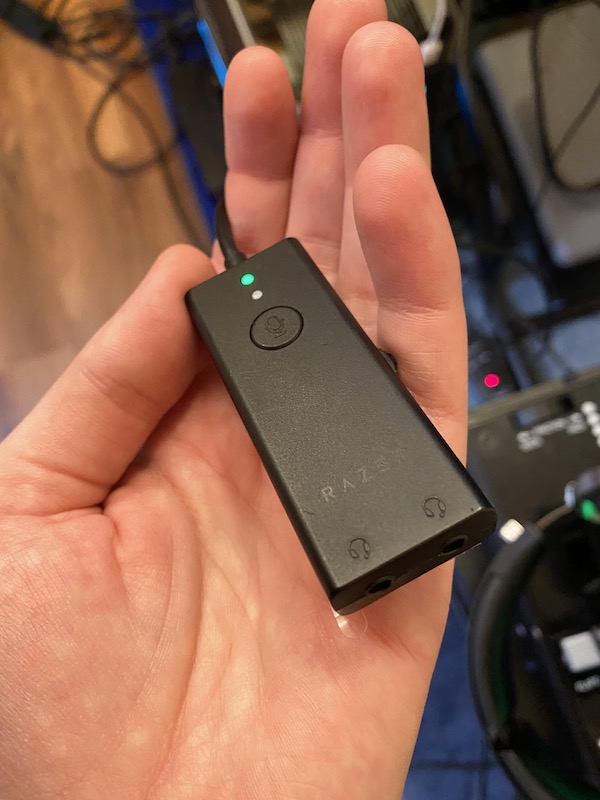
Three plugs. With Phase 4 complete there are now three audio jacks dangling from the helmet and mask assembly: the earphones, the boom microphone, and the oxygen mask microphone. I was worried I’d need to have three different audio devices recognized by my computer - and that’d be a nightmare to switch across my streaming software, simulator, and voice control system. Fortunately, the answer is right at hand from Phase 1 - the Razer Ifrit. It came with a 3.5mm double-plug to USB “Audio Enhancer”. One device recognized by the computer, with the ability to mix two 3.5mm inputs! Therefore, to run Tusk Phase 4, I have the earphones plugged into Slot 1, and can alternate between the Boom Mic, or the Oxygen Mask Mic, in Slot 2.
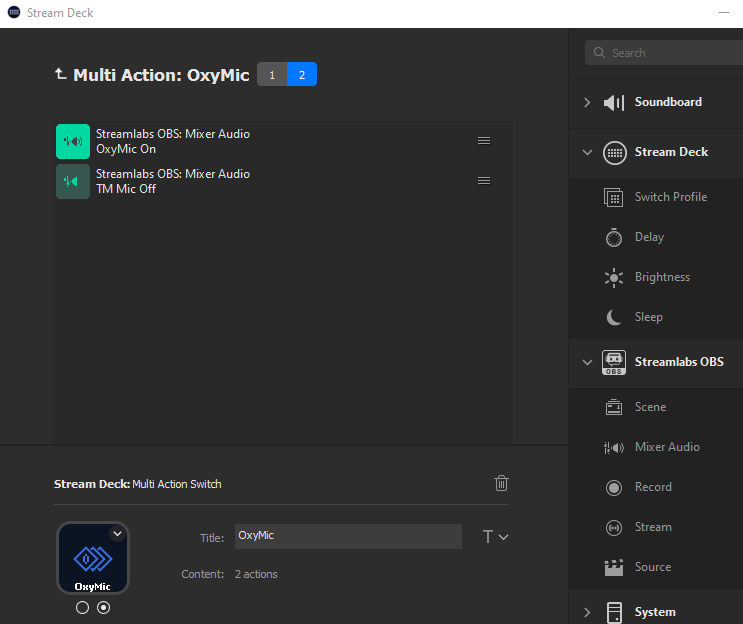
No hardware gain control. The lavalier microphone has no hardware adjustments for gain - this is not a problem in the boom microphone, but in the oxygen mask it is a serious issue - in the echo chamber of the mask, right up close to my face, at full gain the volume output causes significant clipping. Because it’s not considered a separate device (see above “Three plugs”), there’s no system-level gain decrease I can impose on it when plugging it in versus the boom mic. To fix this partially, I use the Elgato Stream Deck and two virtual inputs in Streamlabs OBS:
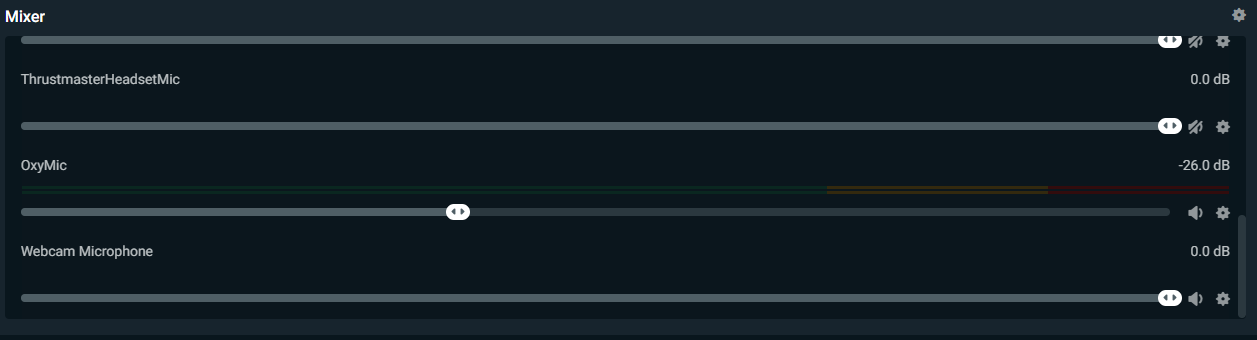
The Oxy Mic audio input on Streamlabs OBS is adjusted down by 26dB to prevent clipping. It’s imperfect - as a System device it still comes through at full gain meaning my voice recognition software almost never understands what I’m saying in the mask. Still thinking about how to fix this one.
What Comes Next
This concludes the four initial phases of Project Tusk. I did skip Phase 2 as I don’t see a good solution for fitting my Valve Index VR to the helmet, so that’s something to revisit moving forward.
I’m also interested in polishing the overall appearance of the helmet. It’s storied and has a lot of personality, but at a minimum I’d like to ensure the Navy title and wings get refreshed - I’ve got a set of those in my hands now (Thanks, Flighthelmet.com!)

Overall, the goal of Tusk is to breathe new life into a historical artifact that has seen a lifetime of service; allowing the past to continue on, interfaced with the future. I am grateful to the Olson family for their donation of this precious piece of history, and look forward to finding more ways to upgrade and modernize the experience, while still staying respectful of its heritage. Stay tuned for more Project Tusk!