Project Tusk Phase 3 Prototype Complete: Working Audio
Scroll DownThis is a blog post in the Project Tusk series. To read about the project, see Project Tusk.
Basic Description
Previously, the Tusk helmet experience has relied on a secondary, one-unit low-profile stereo earphone and boom microphone headset that is slipped on before donning the helmet. It is uncomfortable, and introduces complexity and a lack of authenticity into the Tusk system.
The goal of Phase 3 is to make that secondary system unnecessary, by installing real audio hardware right into the helmet.
As of now, Phase 3 is operational, albeit with plenty of opportunities to improve. High-quality audio output and input are now coming through the helmet hardware!
Check Out the Video
A full breakdown of the Tusk Phase 3 build is available on YouTube, including a brief Flight Test - this gives a good idea of the steps involved.
For all Tusk videos, see the Project Tusk playlist on YouTube.
The build took a significant breakdown of modern audio components, a reprofiling of the helmet’s ear cups to fit them, and a bit of improvised wire running to keep things nice and streamlined.
The Tusk helmet experience in Phases 1 and 2 relies on a secondary, one-unit low-profile stereo earphone and boom microphone headset that is slipped on before donning the helmet.
Here’s a video of the latest flight using the Phase 1 system:
For all Tusk videos, see the Project Tusk playlist on YouTube.
As you can see, it’s workable - but it’s uncomfortable. The helmet hardware puts significant pressure on the headset, which ultimately puts pressure on the wearer in the form of a headache. Flights over 30 minutes are not recommended with this headset/helmet combination, and it’s clear that Tusk must integrate the headset into the helmet to increase comfort for the wearer and increase immersion.
Phase 3 is meant to do exactly that; delivering audio - both output and input - through a system integrated into the helmet hardware itself.
It’s a challenging problem. Here’s why.
Audio Details
Modern gaming audio is delivered at 44kHz, 16-bit stereo PCM sound. Headsets use either 3.5mm stereo jacks or USB connectors, and do not require external power to operate.
In a modern flight simulator, the headset delivers the simulator world audio (engines, wind noise, clicks of switches etc) as well as the avionics and radio audio (warning beeps and radio calls), all at a high-fidelity 44kHz.
Similarly, the modern headset microphone transmits more than just radio calls. In a modern gaming stream, there’s a great amount of the pilot chatting, whether talking to themselves, or the stream watchers, all at 44kHz. Voice recognition systems also require the high fidelity of the voice from the microphone if being used to control simulation elements.
This heavy audio workload presents a problem. Authentic, vintage communications headsets and microphones weren’t made for it. They were made for radio transmission at roughly 6kHz, low fidelity. In essence, telephone calls.
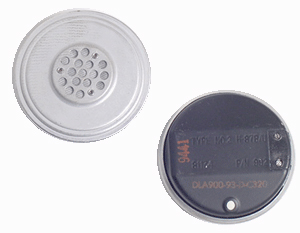
For instance, the APH-6 helmet uses the H-87B earphone with a frequency response up to 7kHz. It can carry a radio transmission, but very little else.
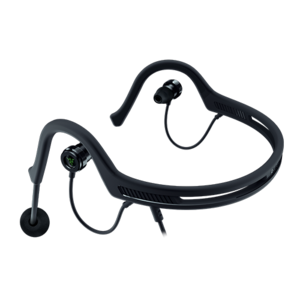
Compare to the Razer Ifrit, the low-profile headset worn under Tusk in Phase 1 and 2: it goes from 20Hz all the way up to 20kHz. It carries the entire gaming audio workload.
This article from Shure was useful in understanding some of the characteristics to look for in headsets.
Split Mixes and Stereo: The Scenarios
Modern simulators also give the option to separate out world sounds and radio sounds - either into different channels on the same audio device, or even into separate audio devices entirely.
Here are the scenarios I could foresee with Tusk:
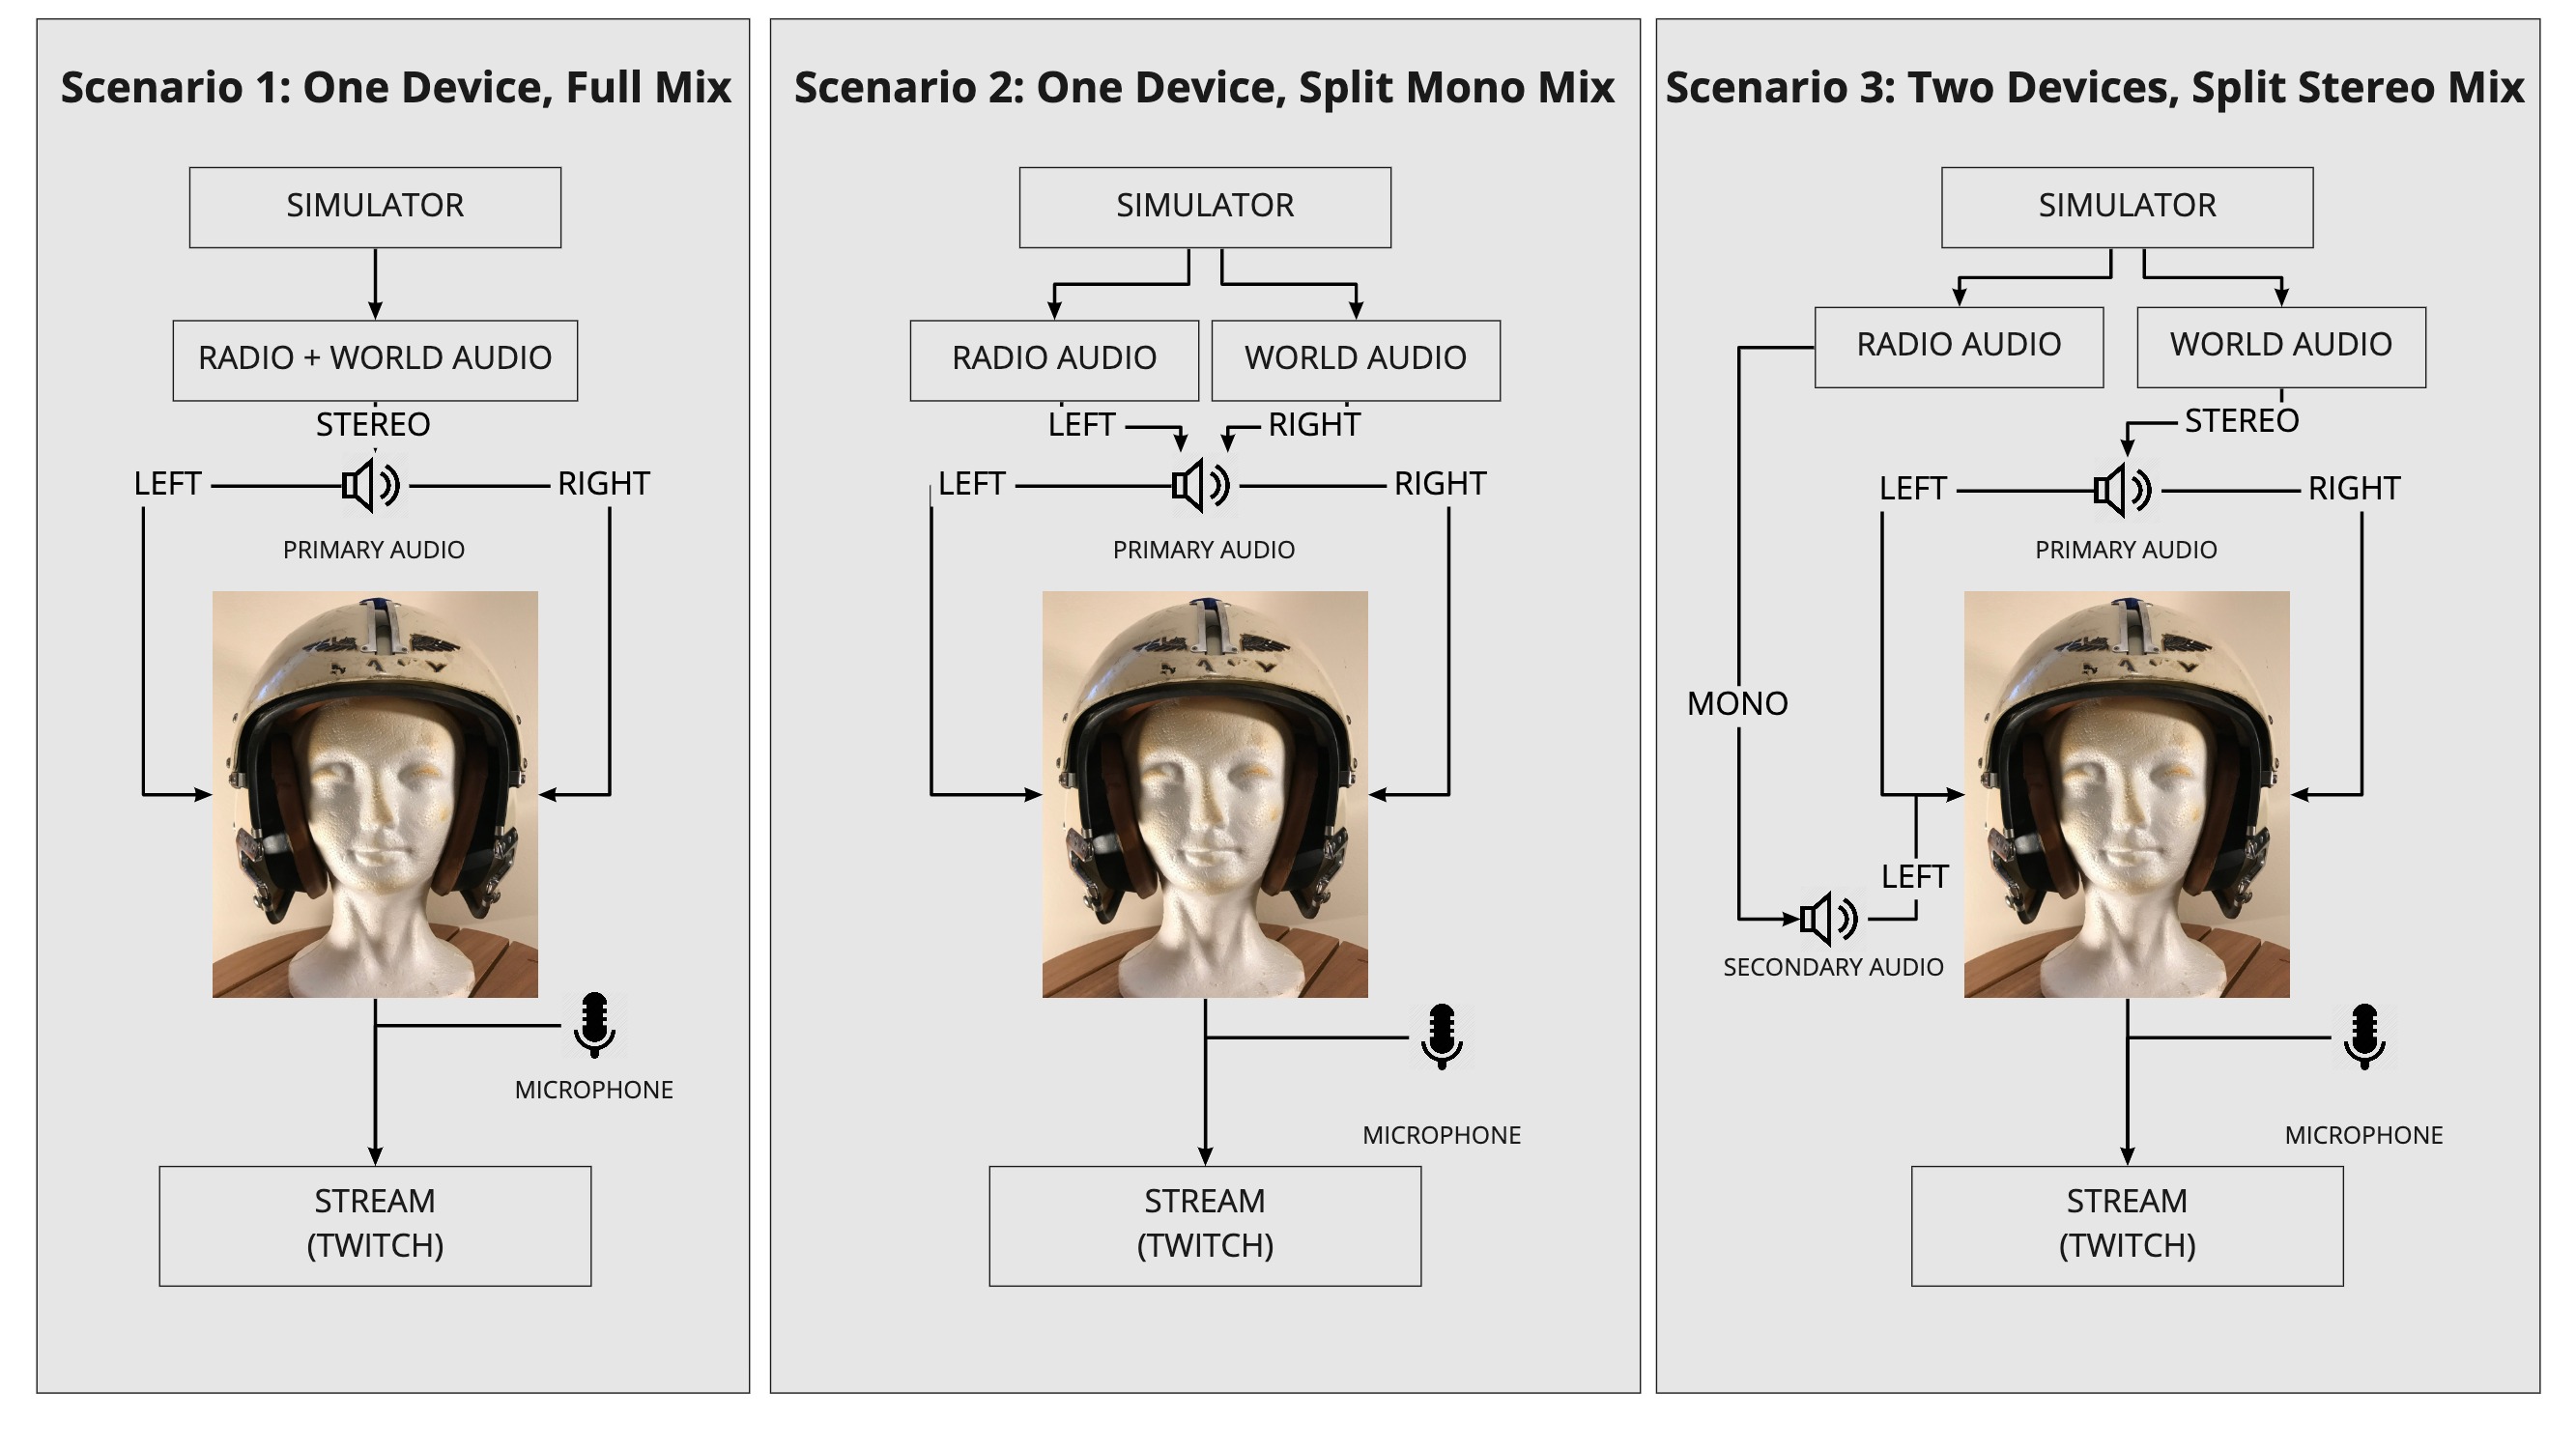
Of the three, it’s most likely I’d use Scenario 1 - because I have discrete control of the mix of sounds coming in, I can boost radio vs. world sounds in software or vice-versa to get just the right mix and not require a secondary audio device. I have considered scenarios where I could project world sounds into the helmet, using its shell as a type of amplifier for all-around world sound, rather than the earcups, and reserve the earcups only for radio transmission, but that can always be done at a later time.
For maximum flexibility, the first audio device should be modern, embedded in the earcups, and can be demoted down to radio-only later - if I find some kind of secondary sound output into the helmet shell - through a software downmix to 7kHz.
The microphone is the same in all scenarios, a boom-type microphone ideally routed through a vintage wire boom as worn on the actual APH-6. There is also a microphone embedded in the oxygen mask, but this is reserved for Phase 4.
We needed to move from the old APH-6 helmet’s 7kHz H-87B earphone, to a modern stereo headset, with either a 3.5mm stereo jack, or a USB connector.
This became the search criteria for the appropriate replacement hardware to go into the helmet’s ear cups. For expediency, it made sense to acquire a basic headset with microphone already assembled and break them apart, rather than start from components and connect them up. Mostly, this was a question of wiring - it’s simpler with the wires all attached, and the distances within the helmet were congruent with the wire lengths in most modern headsets.
Here’s a brief sketch of how it would work:
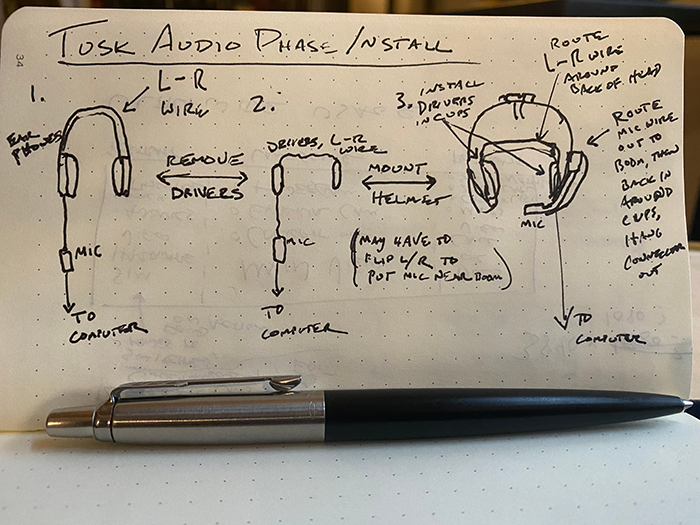
A brief search on Amazon came up with a decent model - the Vogek Wired Headphones with Microphones, for $16. These used a 3.5mm stereo jack, so they could plug right into the Phase 1 Razer Ifrit’s USB dongle without changing the hardware profile in any way. This allows quick switching to the helmet and back to any other 3.5mm headset including my standard Thrustmaster Air Force headset used in Project Nimitz.
The plan was threefold:
- Break down the Vogek headphones.
- Remove old audio components from the helmet.
- Install the broken-down Vogek components in place of the old components inside the helmet.
The video above gives you a good idea of how the steps went - I encourage you to watch the video to learn more. The remainder of this article identifies a few particulars of interest at each step, and some steps for the future.
Notes from The Build
The following issues of interest arose during the breakdown and rebuild:
Loss of ruggedization. It’s debatable that this is even an issue in a simmer’s helmet that would never expect to have to withstand real G-shock, saltwater corrosion, blunt impacts or combat damage, but it was notable to see the overall ruggedized quality of all the original wiring of the helmet components, compared to the very thin, light wiring and insulation present in modern consumer products. Similarly, the size of the connectors was significantly larger as well, and while some of that can be attributed to earlier technology making smaller connectors not feasible for transmission, there’s a user experience lesson in here - real combat pilots are operating with gloved hands, and overminiaturized components simply wouldn’t be grippable in gloves. This practical restriction doesn’t exist in the sim world … unless you’re going for the full realism and flying with Nomex flight gloves. If we cross that bridge, we cross it.
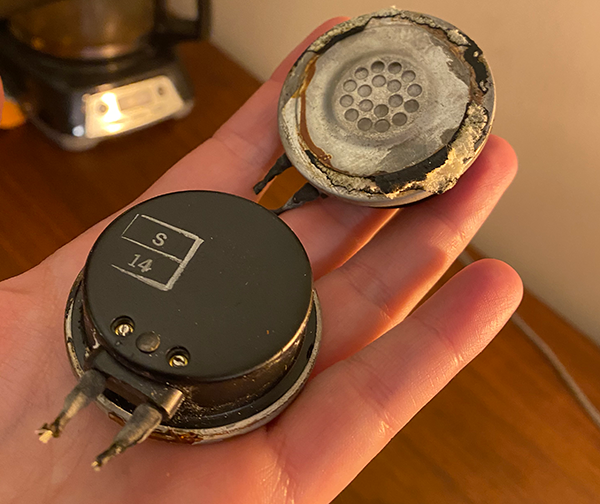
Weight reduction due to new vs old audio drivers. The original H-87B earphone drivers are markedly heavy. Taken together just these two drivers weigh three-quarters of a pound. Again, much of this may be due to ruggedized construction, but we’re talking about audio components built in 1965, so some of today’s reduction is about miniaturization of components - the tech has simply advanced so far. The drivers installed to replace them were plastic-mounted and weighed a fraction of the original.
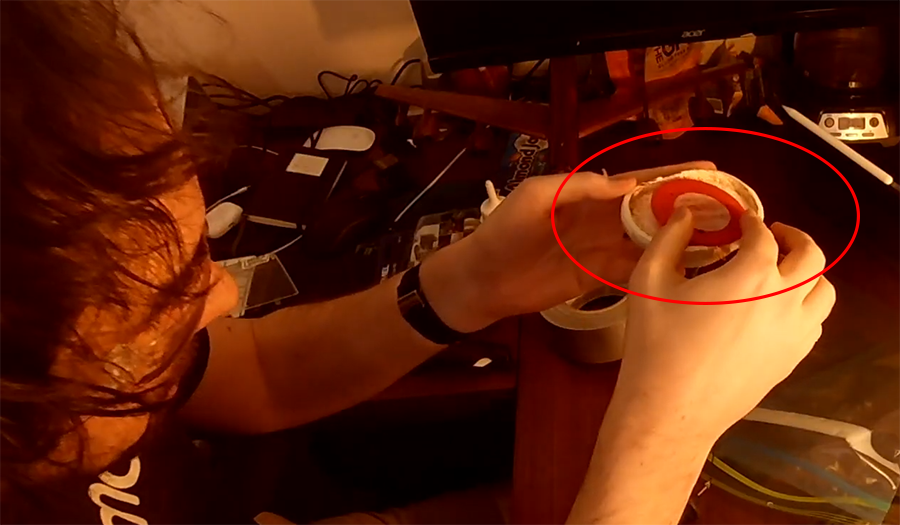
Kept drivers attached to plastic, need to dremel the styrofoam a bit. A key goal of the Vogek breakdown was to ensure no wires were severed. The two drivers and the microphone - and all the wires that connected them - had to be removed from their casing without ever compromising the wires. It was discovered near the end of the breakdown that the drivers themselves were attached by sturdy glue to a red plastic casing on the output side. The choices were to try to break that glue bond and remove the drivers - risking the wires - or try to mount the entire driver/casing unit together, which took up more room. For the sake of the wires, I went with the latter, which meant having to dremel out the stryfoam of the ear cups a bit. I’m always a bit nervous to damage anything considered vintage, but fortunately the surgery needed was minor, and the mount was solid with a bit of duct tape.
What Comes Next
At this point we have the Vogek wired in using duct tape, with a rudimentary wiring run.
Issues:
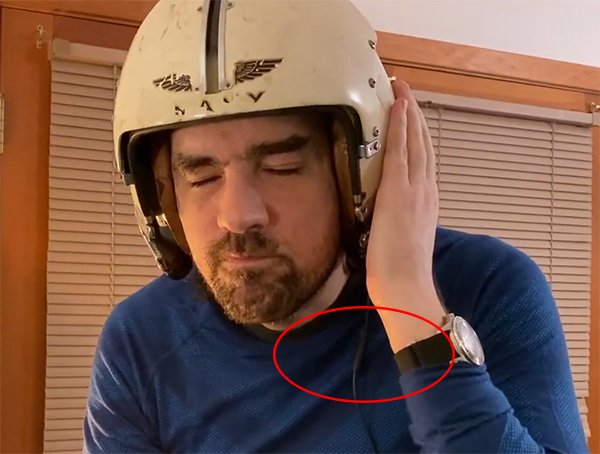
Microphone placement. The microphone hangs near the chest on my left side. It’s hardly in an ideal spot to pick up the best voice transmission. In the flight test mission I had to repeat commands several times, and the voice isn’t coming through at ideal volume in the video.
Bunched wiring in back. The wiring between the ear cups is inexpertly run, taped down with duct tape. There’s too much wiring, and it bunches. Chances are, that’ll end up pulling at an inopportune time.
To handle these scenarios, the following steps need to be taken:
Install a microphone boom assembly. The APH-6 used a rotate-away microphone boom. Instead of a traditional microphone pickup, I’ll run the Vogek microphone up to the boom and then run the wiring back through the helmet to fall down below the left ear cup. The risk is the relatively short distance between the left ear assembly and the microphone pickup - it may be so short that the pickup can’t reach the tip of the boom where it should be, or if it can, there’s no room for the boom to rotate up and out of the way without pulling on the cable.
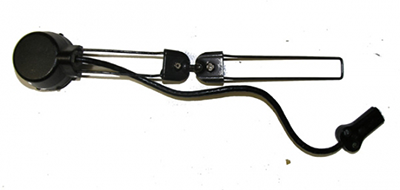
This may mean having to strip the insulation off the wires, splice to create more room, and re-run the wiring. The other issue here is pushing the cable through the helmet to the outside - right now there are no holes big enough for that; a hole will have to be widened with the dremel, which I don’t relish, as it affects the external construction. Fortunately, it’s a minor modification.
Once assembled fully, secure with glue. Right now we’re at the duct-tape phase, with non-permanent fastening of components. Once I’m confident that the wiring does everything needed, duct tape will be replaced with Gorilla Glue at appropriate spots.
Finishing these steps will mark the end of Phase 3, and Phase 4 can begin - the Oxygen mask. Stay tuned for notes on the Phase 3 completion and Phase 4 planning.
